How to set up your 3D configurator first showcase (Part 2)
Table of content
How to set up my showcase
Your step-by-step guide to create your first showcase Part 2: Create materials and setup your 3D product configurator
Define your showcase objectives: Here I want to have 2 colors choices for all my 4 object objects.
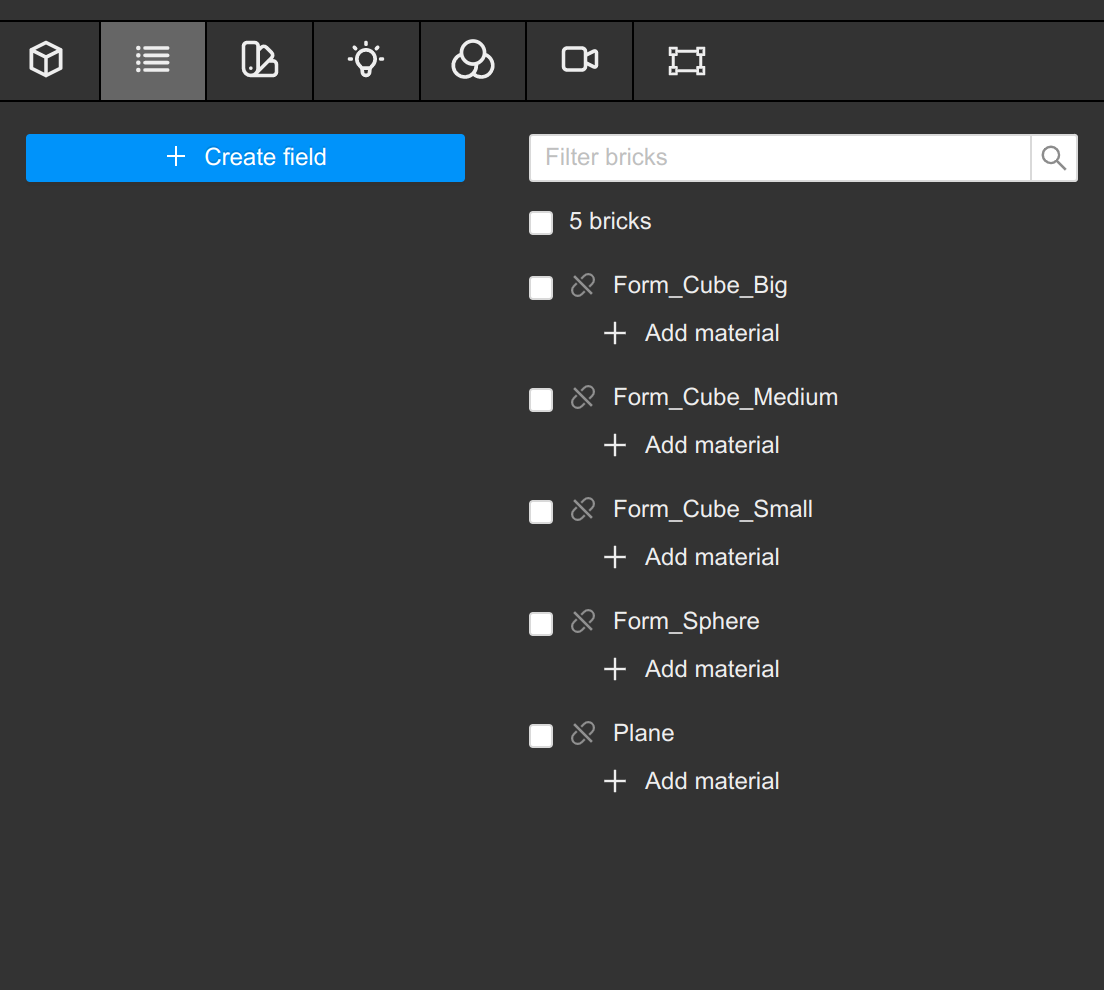
Go to the “Bricks” Menu, you will find your initial setup with the same name as in the example blender file.
4.Create your materials
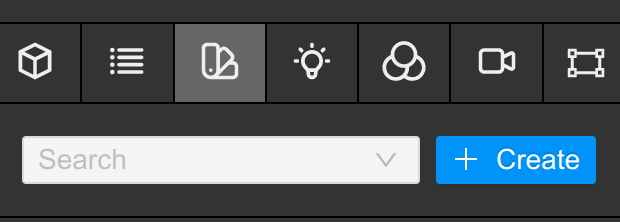
You must use the Menu named “Material” to create your materials library.
Here you can create your own material.
Apviz offers you a dedicated material library but you can create your own PBR material from scratch too.
You can choose between different types of materials. Each material has its own characteristics and parameters.
Here, create 4 PBR materials (change only the Base color setting for now) Don’t forget to Save each material separately.
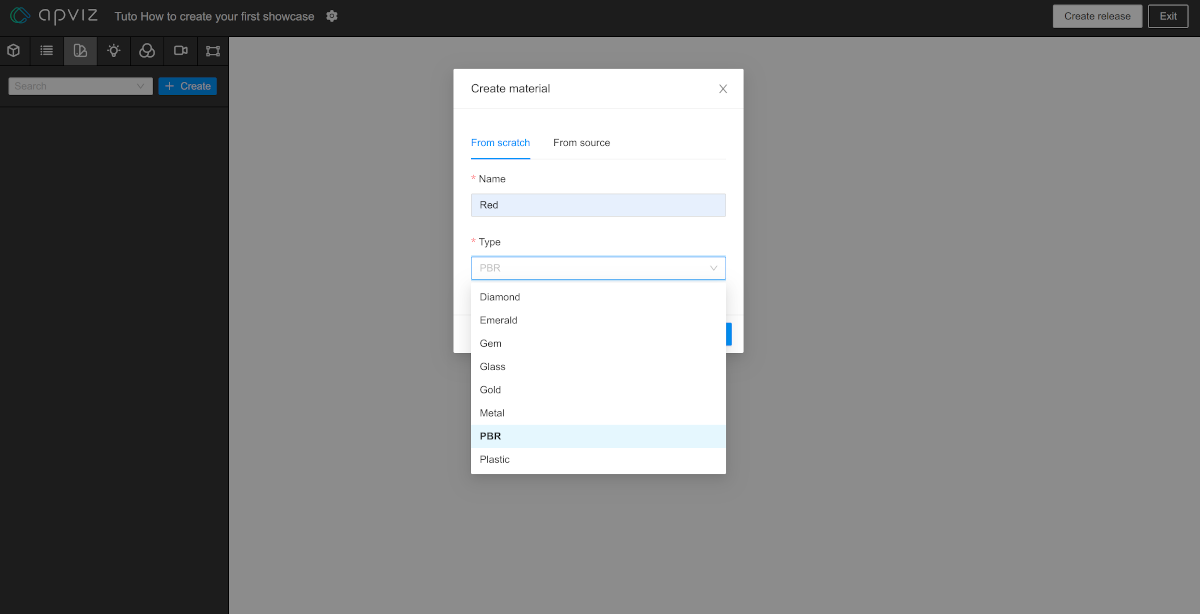
Click on “+ Create” :
You can now create your specific material. Just name it and choose what kind of material you want to use.
Choose PBR type
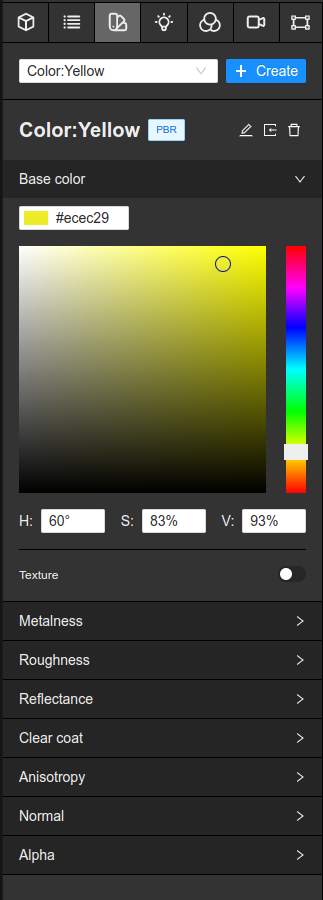
This gives you some parameters to create realistic materials.
Choose the first menu named "Base Color". This menu allows you to define the color of your material.
Create -> Color:Red, Color:Blue, Color:Green, Color:Yellow
5.Define your logical configurator tree
Go to “Field” Menu.
At first, organize your showcase like this:
Sphere
        Blue
        Yellow
Cube_Big
        Red
        Blue
Cube_Medium
        Green
        Red
Cube_Small
       Blue
       Green
At first, the default Apviz Fields menu look like this :
Create your Field for each object with "+ Create a field" and Field Value for each color choices with “Fields Value”
Your project is set up now. But you can't display any material or object yet.
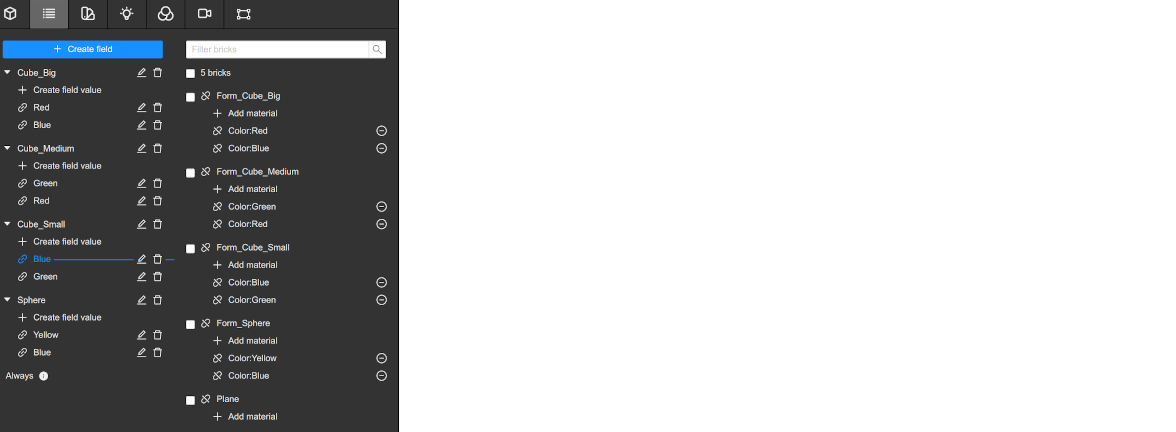
We will connect Fields and Fields Value with the right color materials.
In Field “Sphere”, connect your Field Value named “Yellow”
Field_Sphere /Yellow > Form_Sphere /Color:yellow.

Now you can see the material displayed.
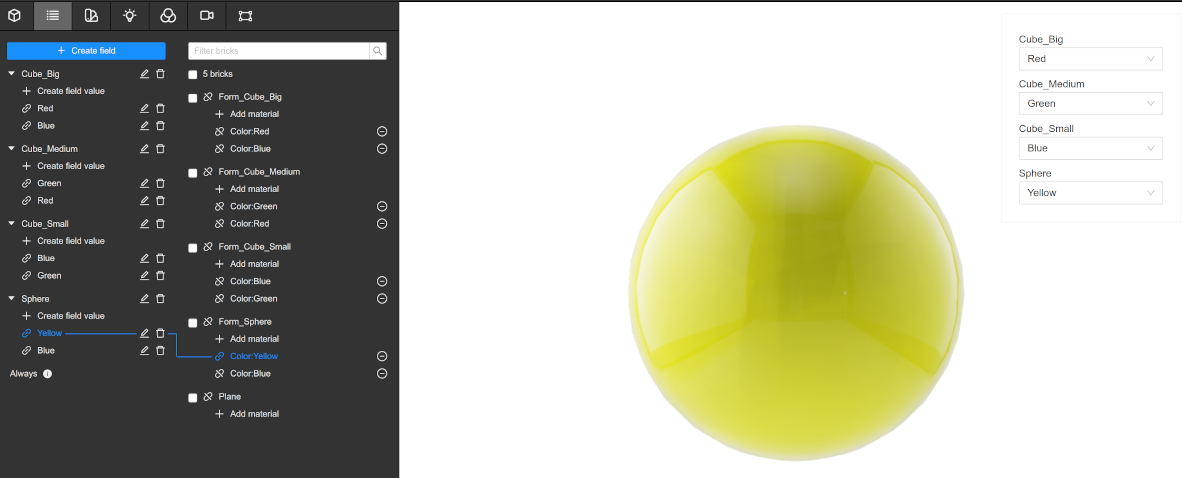
Do another link Sphere /Blue -> Form_Sphere /Color:Blue.
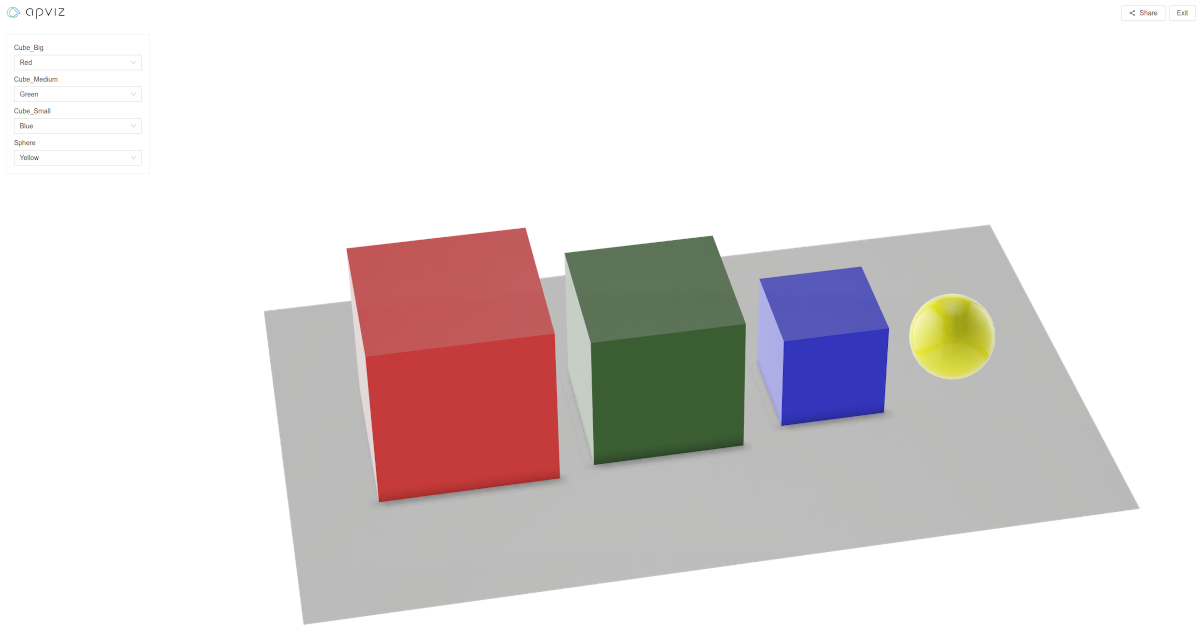
You can now choose between Yellow and blue colors to display your sphere.
Congratulations you have done your first 3D configurator!
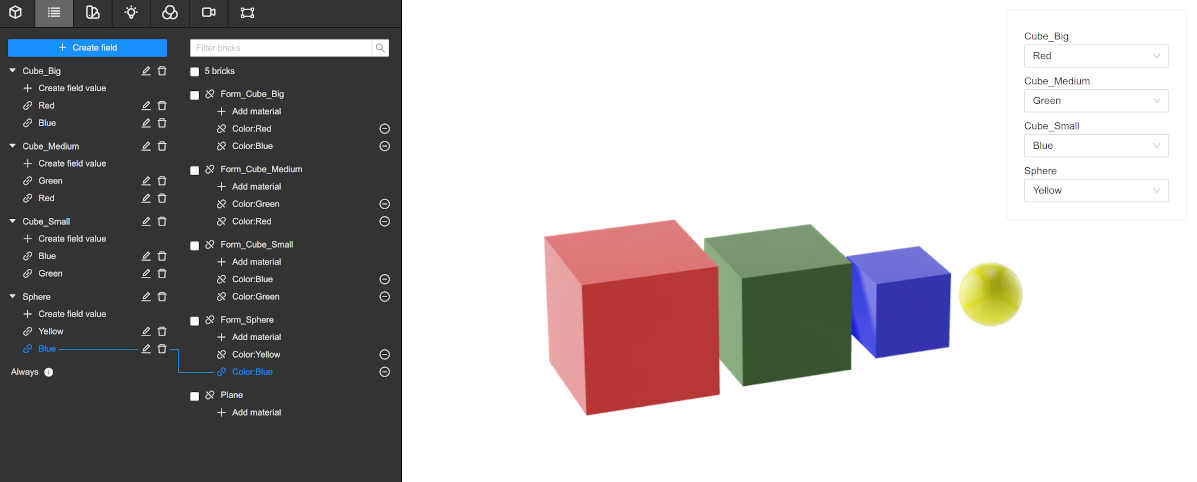
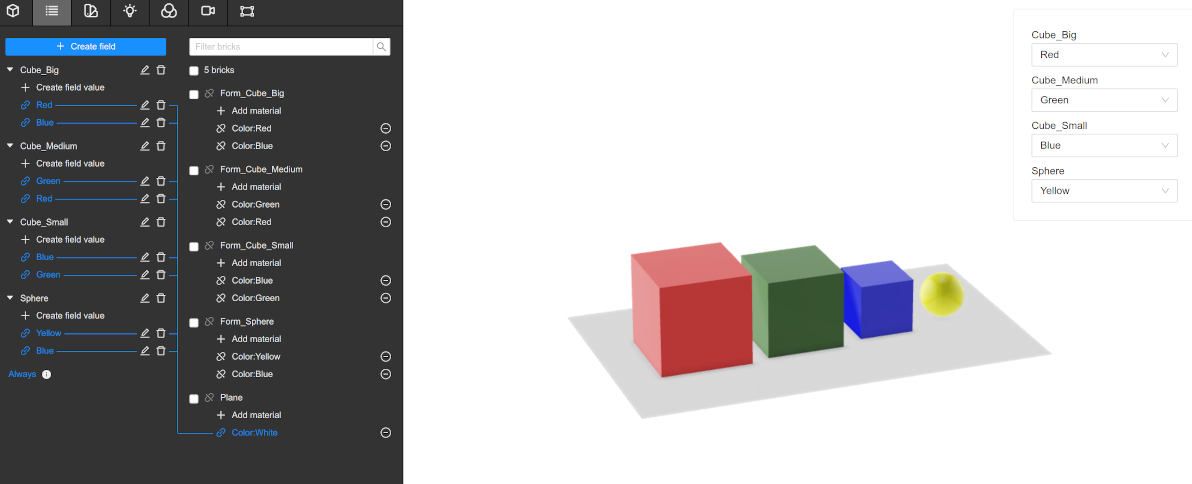
Do the same logical links for all your Fields and Forms.
Here with all the connections done, you can now choose between different PBR colors materials.
For my Form PIane I just want a single White (PBR) material without any menu.
I create my Color:White material in “Material” menu ( I define a light grey #c7c7c7).
In the “Field” menu, go to Plan Form and click + add Material then choose Color:White select “Always !” and select Plan_Form /Color:White
You can now create your first and immutable release with the “Create Release” Menu and embed your 3D configurator into your ecommerce website.
By Hugo Rimélé - Sun Oct 09 2022