New realtime image printing feature
Table of content
Realtime image printing personalization
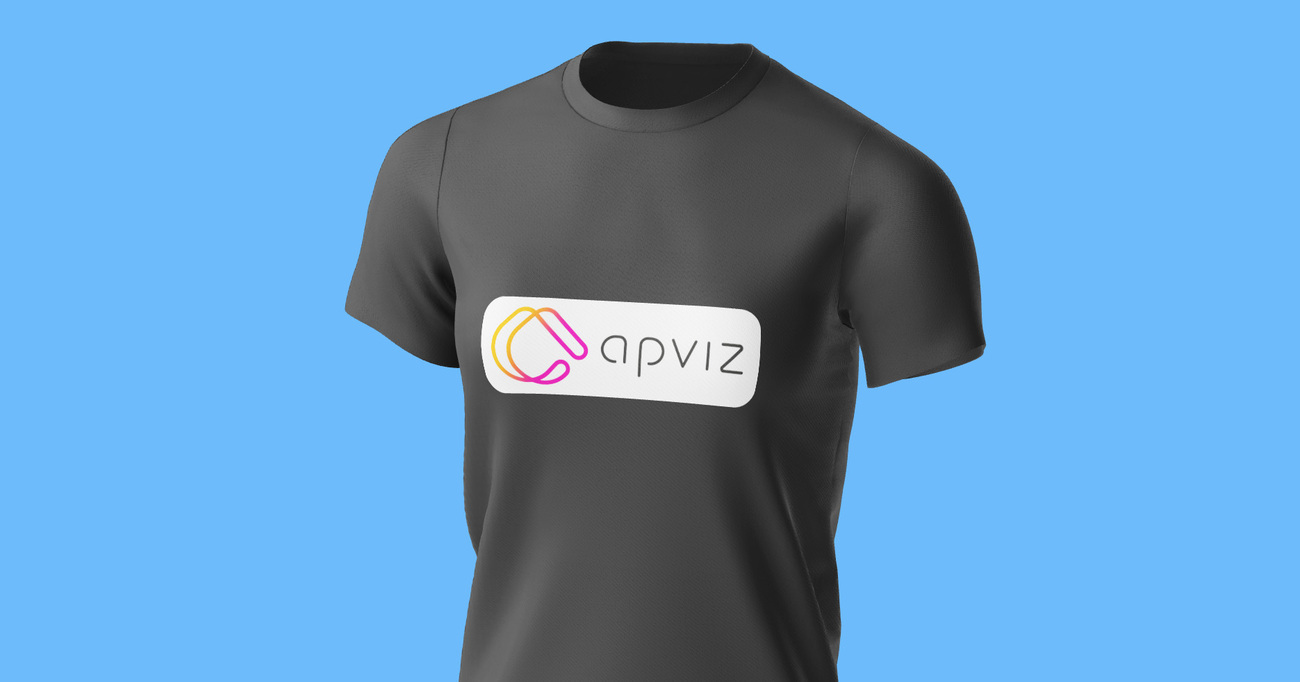
Today we are happy to announce a new Apviz feature: Realtime image personalization for web-to-print.
If you're selling handbags, mugs, clothes, jewelry, watches or even furniture, this feature will help you best showcase all your personalization options, as it is a high quality & realistic simulation rendering of printing, flocking, silkscreen on your 3D products.
Get in touch with your Apviz account manager or use the contact form if you are interrested with this feature.
Setup
First you need to define your marking zone in your 3D model by creating a new dedicated mesh in your favourite 3D software.
The marking zone mesh must cover the targeted mesh object you want to apply marking on with a slight gap (to avoid mesh overlapping). Make also sure to craft proper UV mapping.

Then you export your 3D model as OBJ file and import it to your showcase via 3D editor (or the GraphQL API):
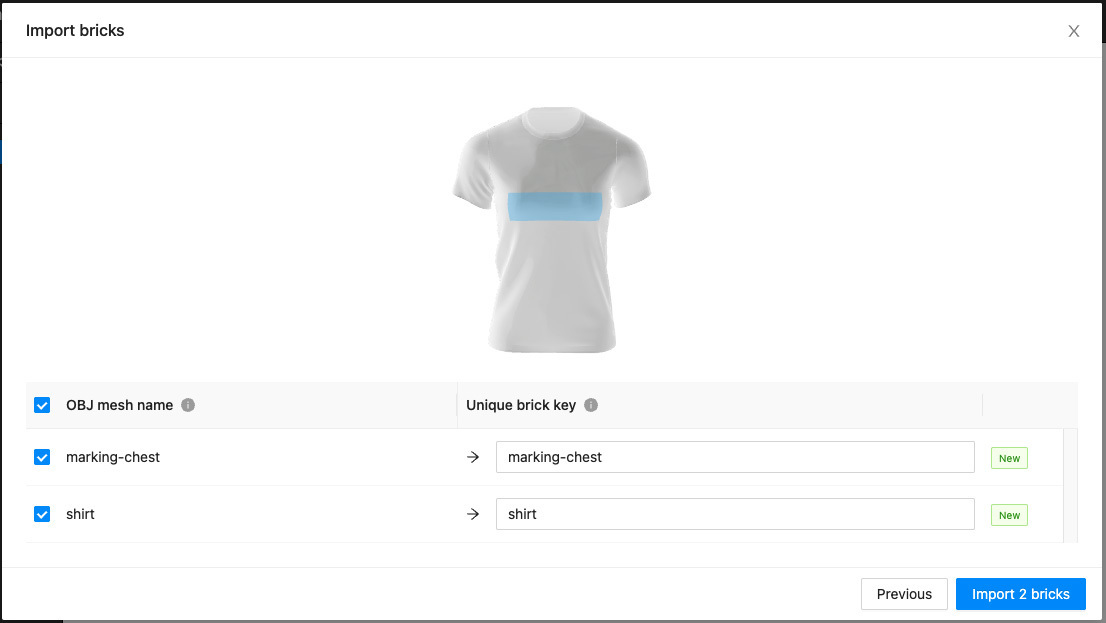
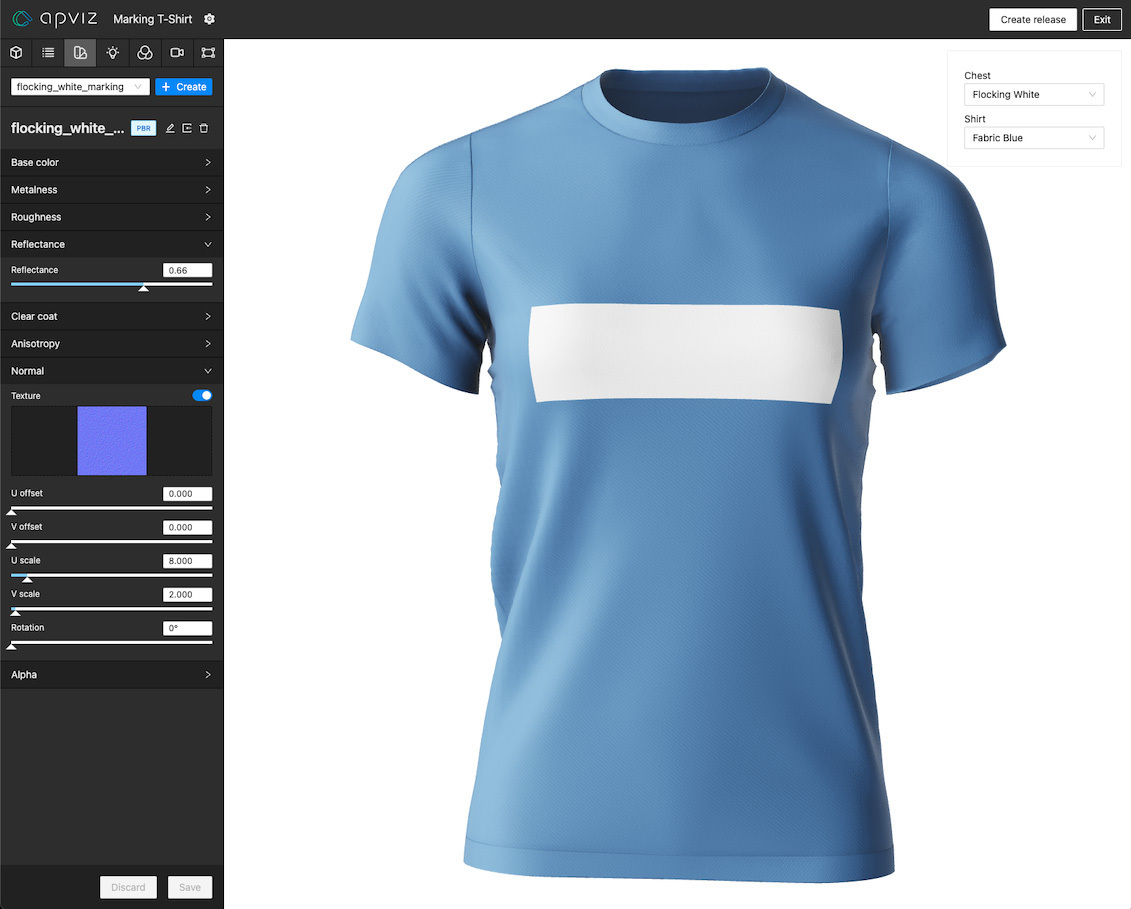
As usual, define material and field/value configuration rules:
The final step is to assign a marking zone key to your brick:
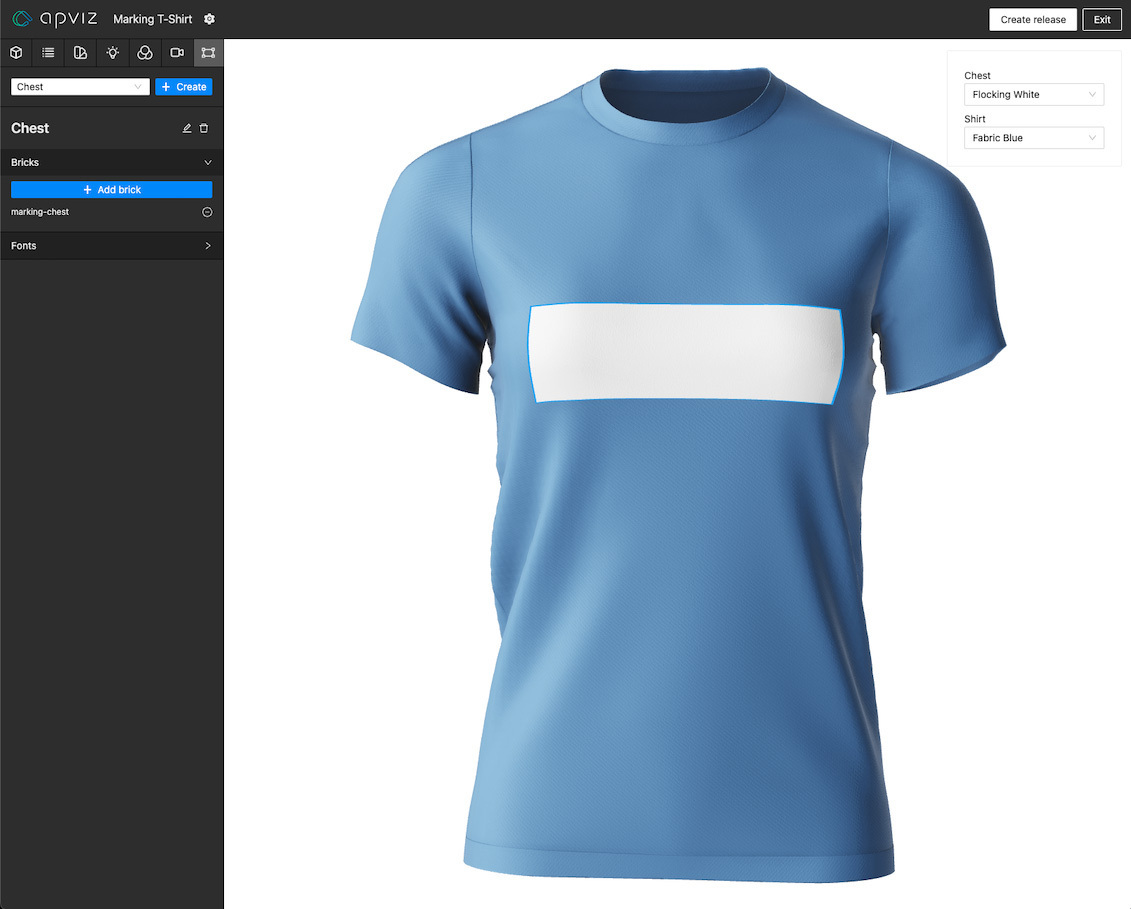
You are now ready to craft a new release and integrate realtime image web-to-print personalization to your website.
Integration
You can dynamically display an image on a predefined marking zone using Viewer.update with the markingZones parameter.
The image you want to set must be nested within the markingZones parameter object using the marking zone key you want to target. If you need to update multiple zones at the same time, you can set multiple marking zone keys.
The provided image.color.source value:
- Supports PNG, JPEG, GIF, SVG, BMP, and ICO image formats.
- May be any of those JavaScript types:
Fileto get the image from an HTML input file type.HTMLImageElementto get the image from an URL.ImageDatato get the image from an HTML canvas.
<!doctype html>
<html>
  <head>
    <title>Apviz - Demo T-Shirt</title>
  </head>
  <style>
    * { margin: 0; padding: 0; box-sizing: border-box; }
    #my-image-input { position: absolute; top: 10px; left: 10px; }
  </style>
  <body>
    <!-- Apviz 3D viewer. -->
    <div id="apviz-3d-viewer"></div>

    <!-- Your image input button. -->
    <input id="my-image-input" type="file" accept=".png,.jpg,.jpeg,.bmp,.gif,.ico,.svg">

    <!-- Your custom initialization script. -->
    <script>
      async function apvizShowcaseReady(showcase) {

        // Initialize a 3D viewer and bind it to the <div>.
        const viewer = await showcase.createViewer({
          divId : "apviz-3d-viewer"
        });

        // Initial configuration that MUST explicitly include ALL the fields.
        // This will start displaying 3D.
        await viewer.update({
          fields : {
            "Shirt" : "Fabric Blue",
            "Chest" : "Fabric White"
          }
        });

        // File input event handler.
        document.querySelector("#my-image-input").addEventListener("change", e => {
          viewer.update({
            markingZones : {
              // Targets a specific marking zone via it's key.
              "ChestZone" : {
                image : {
                  color : { source: e.target.files[0] }
                }
              }
            }
          })
        });

      }
    </script>

    <!-- Non-blocking async script that will call "apvizShowcaseReady" once fully loaded. -->
    <script
      src="https://public.apviz.io/showcases/U0hPVzo5cHBEUDBtaEFM/releases/UkVMUzpOSDhPR2FqWk5D/main.js"
      integrity="sha384-cXXEa4/HtUsVTmv1RVIs4ZiWm842HGhhZyc8BP6VOm9NVBIExN5I3BSQU0/WoK01"
      defer
      crossorigin="anonymous"
      data-apviz-callback="apvizShowcaseReady"
    ></script>
  </body>
</html>
The provided image is displayed with the following rules:
- Image is stretched within the underlying marking zone according to the provided brick UV mapping.
- RGB(A) are blended in multiply mode with the underlying marking zone material.

More real world samples to better undertand how the marking surface mixes with the image:

ℹ️ To remove the marking image, you can update the viewer with the marking zone key set to null.
🔐 Note that Apviz does not store the provided images on any server by itself.
Prototyping
If you need to get all configurable marking zones at runtime you can call the static getMarkingZones method:
async function apvizShowcaseReady(showcase) {
  // Returns an object with the following structure:
  // {
  //   markingZones : [
  //    { key: "ChestZone" },
  //    { key: "BackZone" }
  //   ]
  // }
  const { markingZones } = await showcase.getMarkingZones();
}
ℹ️ This method is intended to ease debugging or fast prototyping. Keep in mind that Apviz is not designed to handle human readable UI menu items.
What's next?
We are actually working on some features that will arrive quite soon:
- Marking text for engraving, embossing, debossing, etc.
- Rendering performances optimizations
- Smart camera improvements
Stay tuned to the changelog ;)
By Yves Merlicco - Wed Jun 15 2022